PFsense - OpenVPN Client Configuration
Last updated by Andrew Mcleod on July 22, 2021 22:07
1. Download your OpenVPN configuration files (Regenerate key files) to your computer.
2. NOTE: you will have to remove the password or have support remove your password from your key files in order for this to successfully work.
If you have OpenSSL installed you can use the following command
openssl rsa -in username.key -out username.keyout use username.keyout going forward, instead of username.key
3. Begin by logging into your PFsenes backend, e.g. http://192.168.1.1/
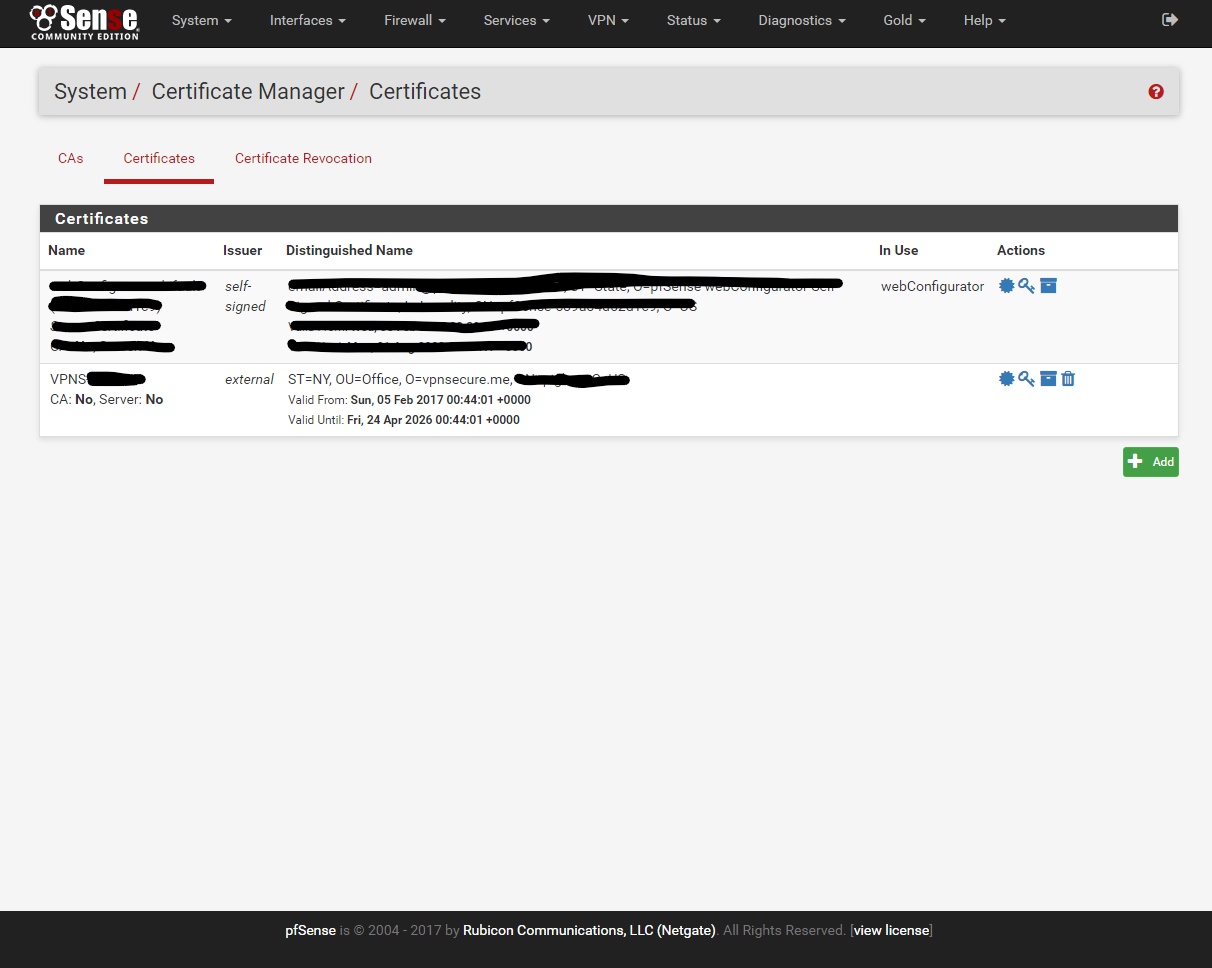
4. Go to System/Cert. Manager/Certificate add a new Certificate
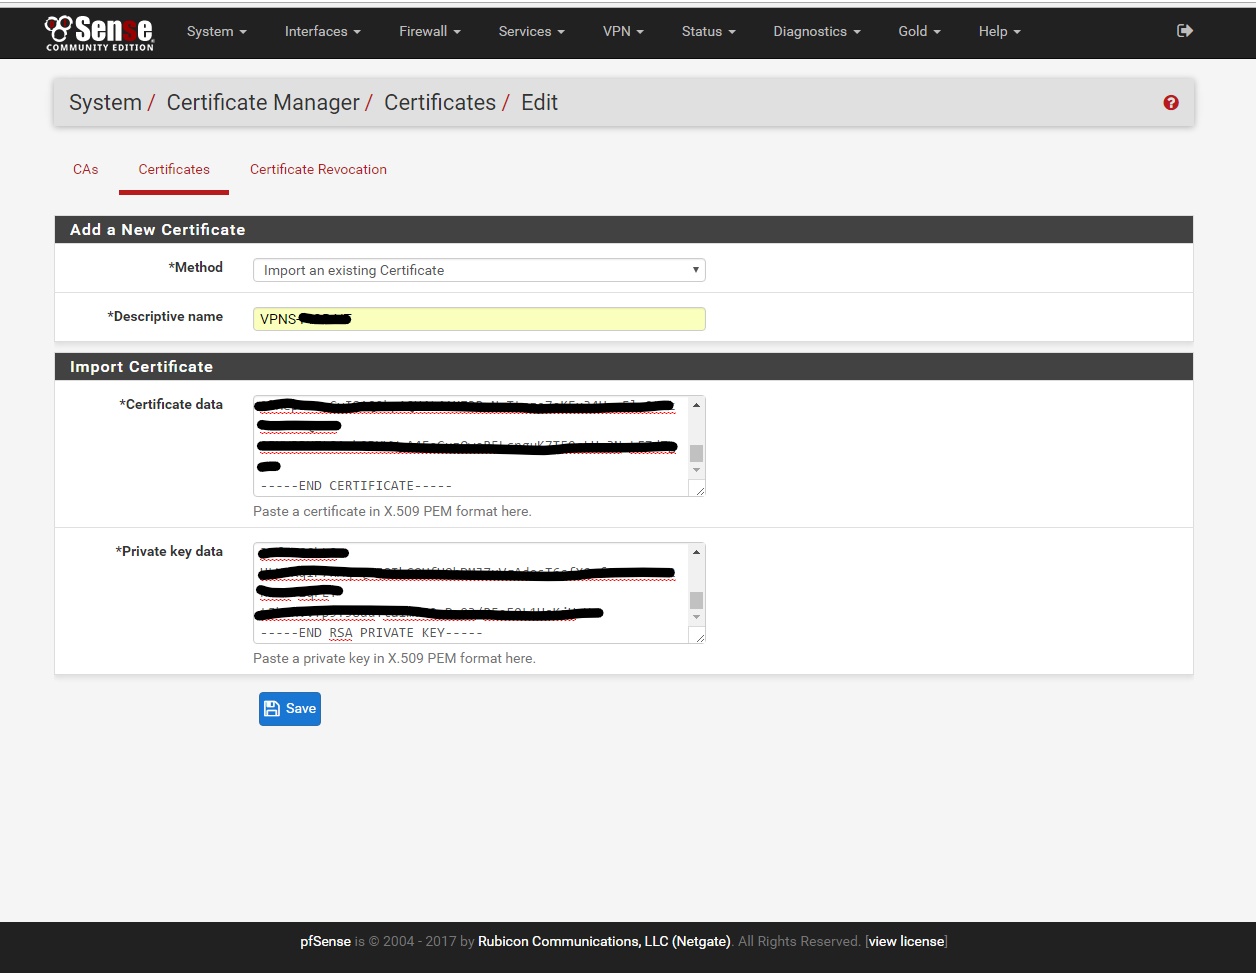
Descriptive name: VPNS-“USERNAME” - put your username without quotations
Certificate data: Open with Notepad the 'YOURUSERNAME.crt' file from the zip you downloaded in step (1) and copy/patse all of the contents from 'YOURUSERNAME.crt' into this field
Private Key data: Open with Notepad the ‘USERNAME.KEYOUT’ file from step (2) and copy/patse all of the contents from 'USERNAME.KEYOUT' into this field
***REMBER THIS NEEDS TO HAVE THE PASSWORD REMOVED*** contact support if your not sure how.
Click Save
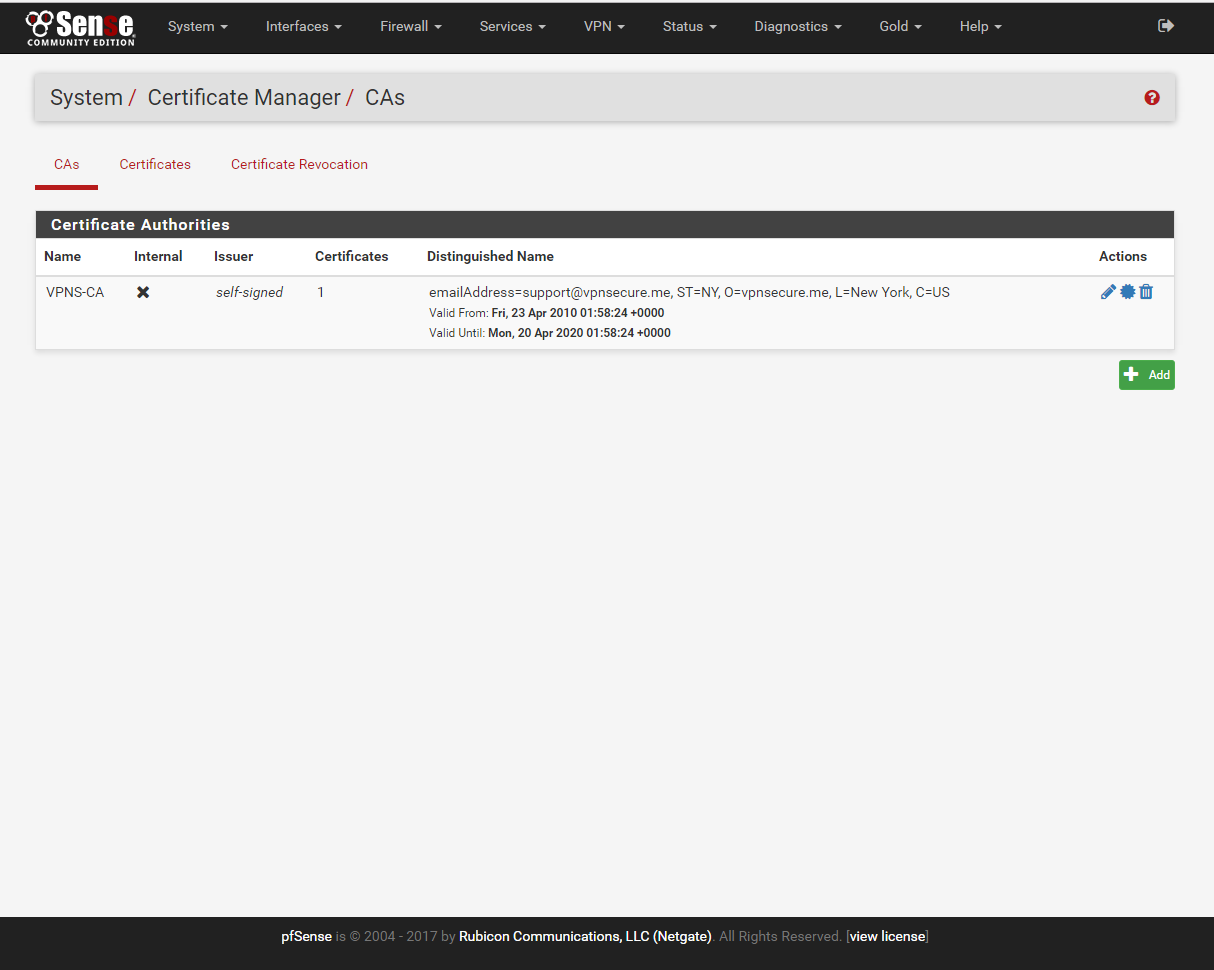
5. Go to System/Cert. Manager/CAs add new CAs
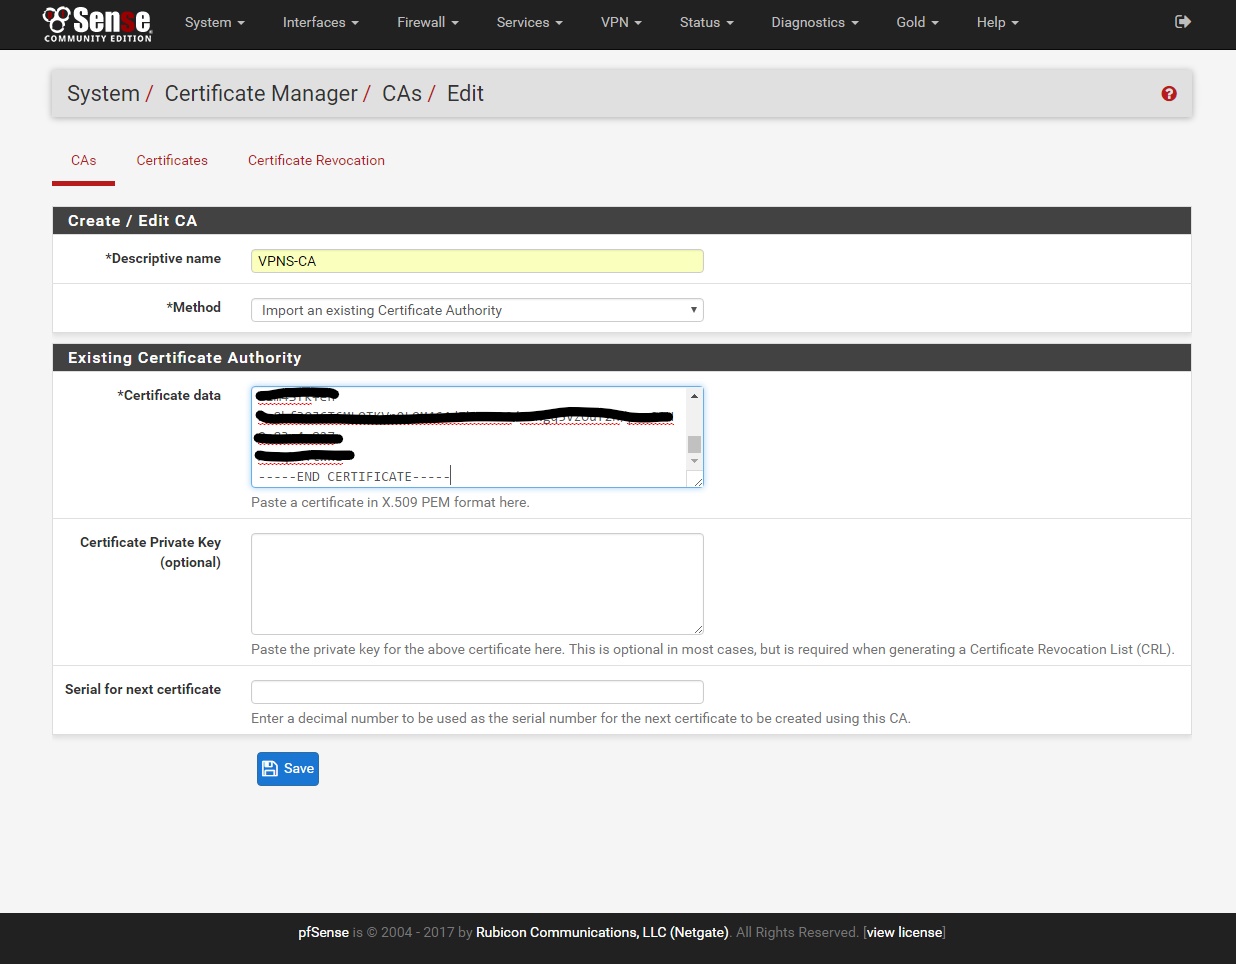
Descriptive name: VPNS-CA
Certificate data: Open with Notepad the 'ca.crt' file from the zip you downloaded in step (1) and copy/paste all of the contents from 'ca.crt' into this field.
Click save.
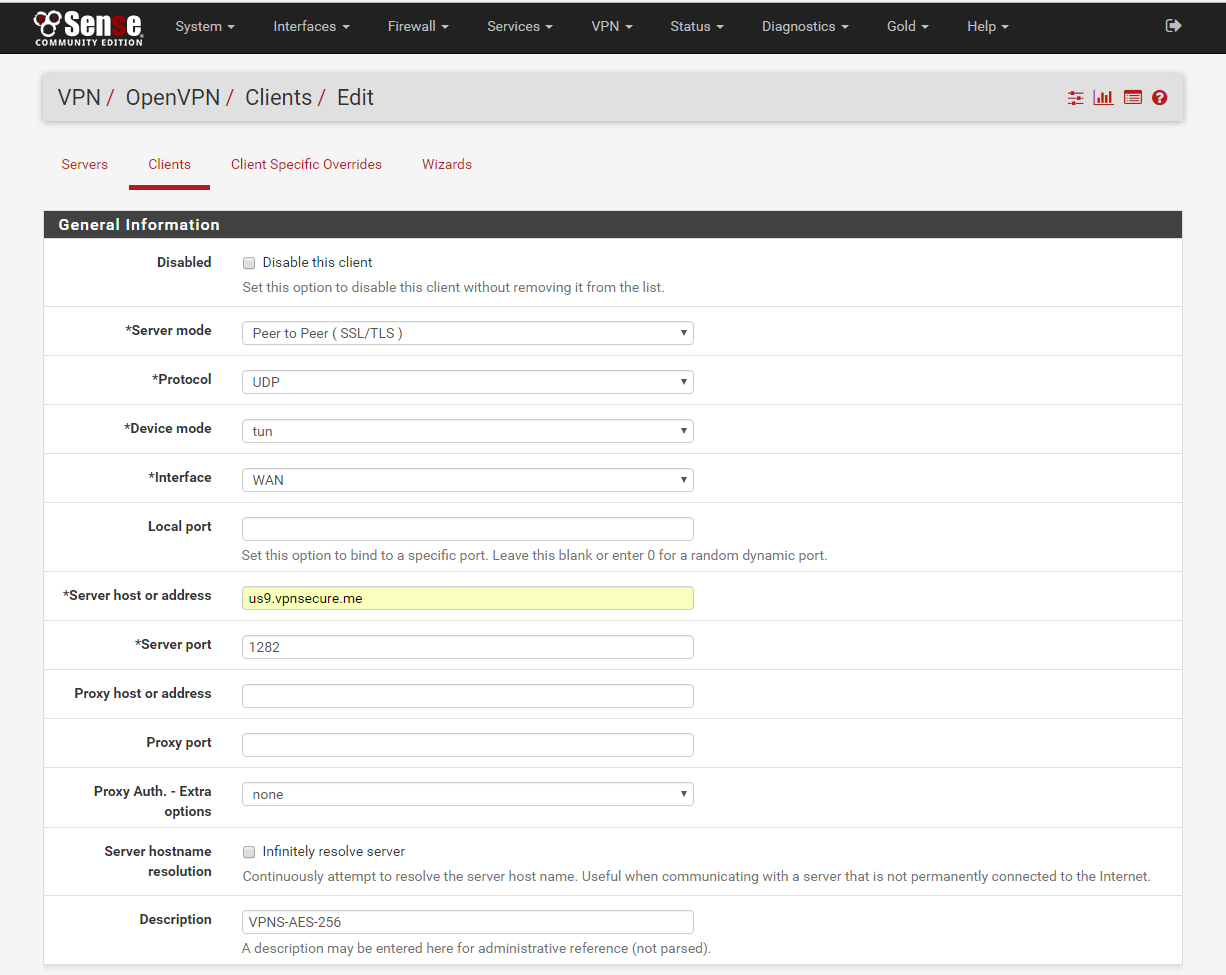
6. Go to VPN/OpenVPN/Clients add new Client.
Disabled: Unchecked
Server mode: Default
Protocol: UDP
Device mode: tun
Interface: WAN
Local port: Blank
Server host or address: us9.vpnsecure.me or your favorite - You can use the short codes from www.vpnsecure.me/locations
Server port: 1282
***DES-CBC port:1191, AES-128-CBC port:1281, AES-256-CBC port:1282***
Proxy host or address: Blank
Proxy port: Blank
Proxy Auth. - Extra options: none
Server hostname resolution: Unchecked
Description: VPNS-AES-256 or what ever your like
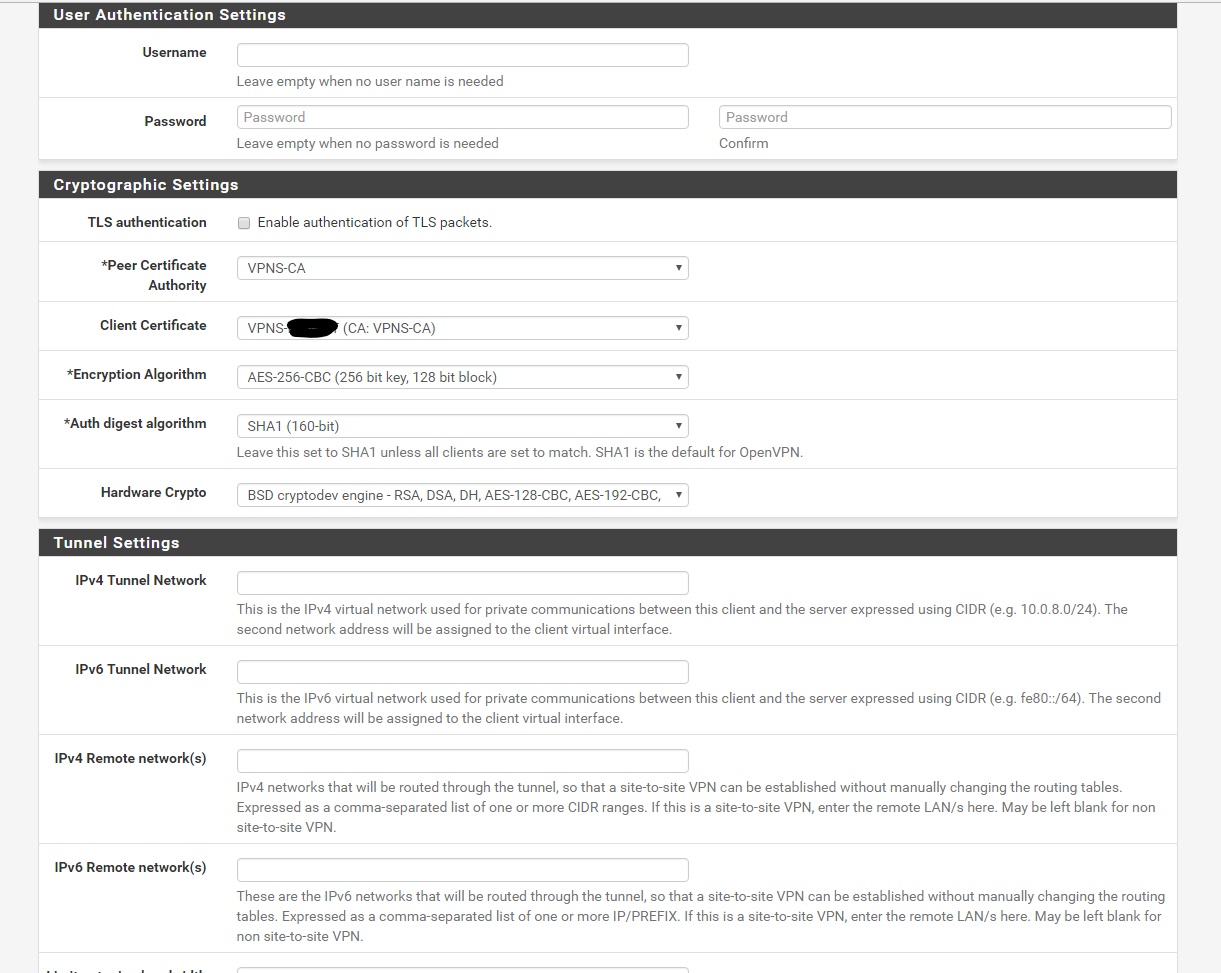
Username: Blank
Password: Blank
TLS authentication: Unchecked
Peer Certificate Authority: VPNS-CA
Client Certificate: VPNS-“YOURUSERNAME” (CA: VPNS-CA)
Encryption Algorithm: AES-256-CBC (256 bit key, 128 bit block)
Auth digest algorithm: SHA1 (160-bit)
Hardware Crypto: ***Only if you CPU supports it***
IPv4 Tunnel Network: Blank
IPv6 Tunnel Network: Blank
IPv4 Remote network(s): Blank
IPv6 Remote network(s): Blank
Limit outgoing bandwidth: Blank
Compression: Enabled Adaptive compression
Topology: Default
Type-of-Service: Unchecked
Disable IPv6: Unchecked
Don't pull routes: Unchecked
Don't add/remove routes: Unchecked
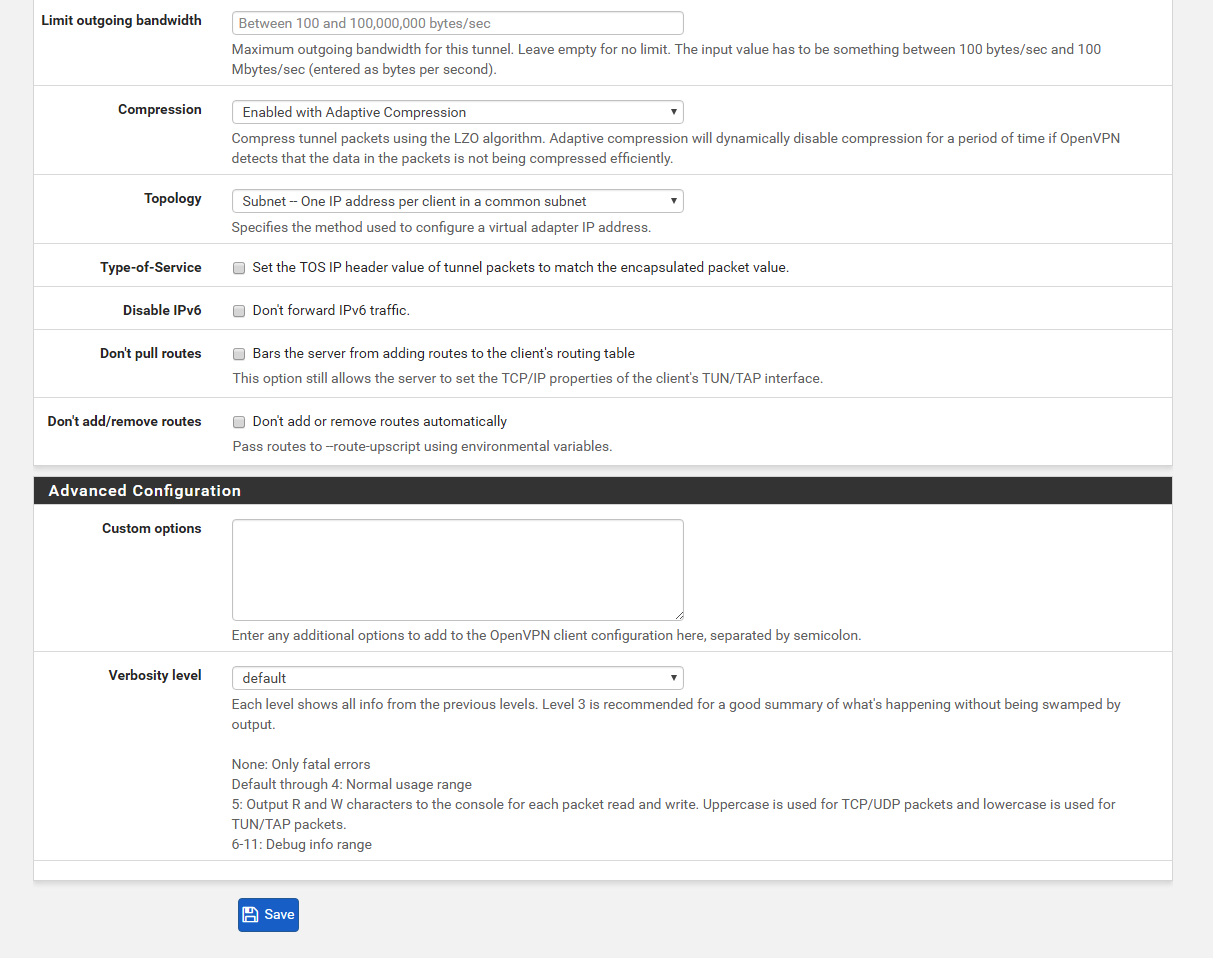
Click Save
7. Go to Interface/(assign) click add.
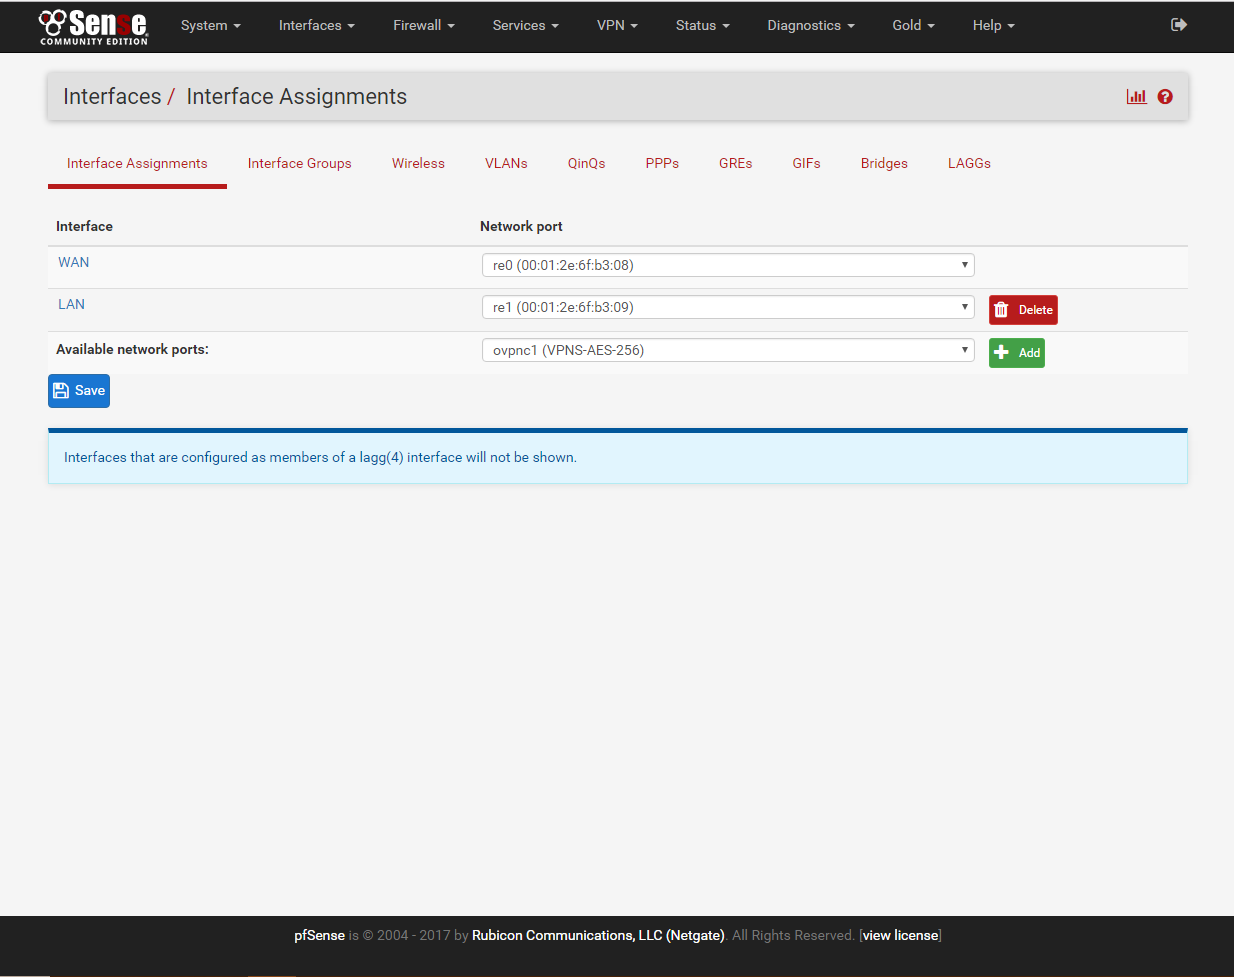
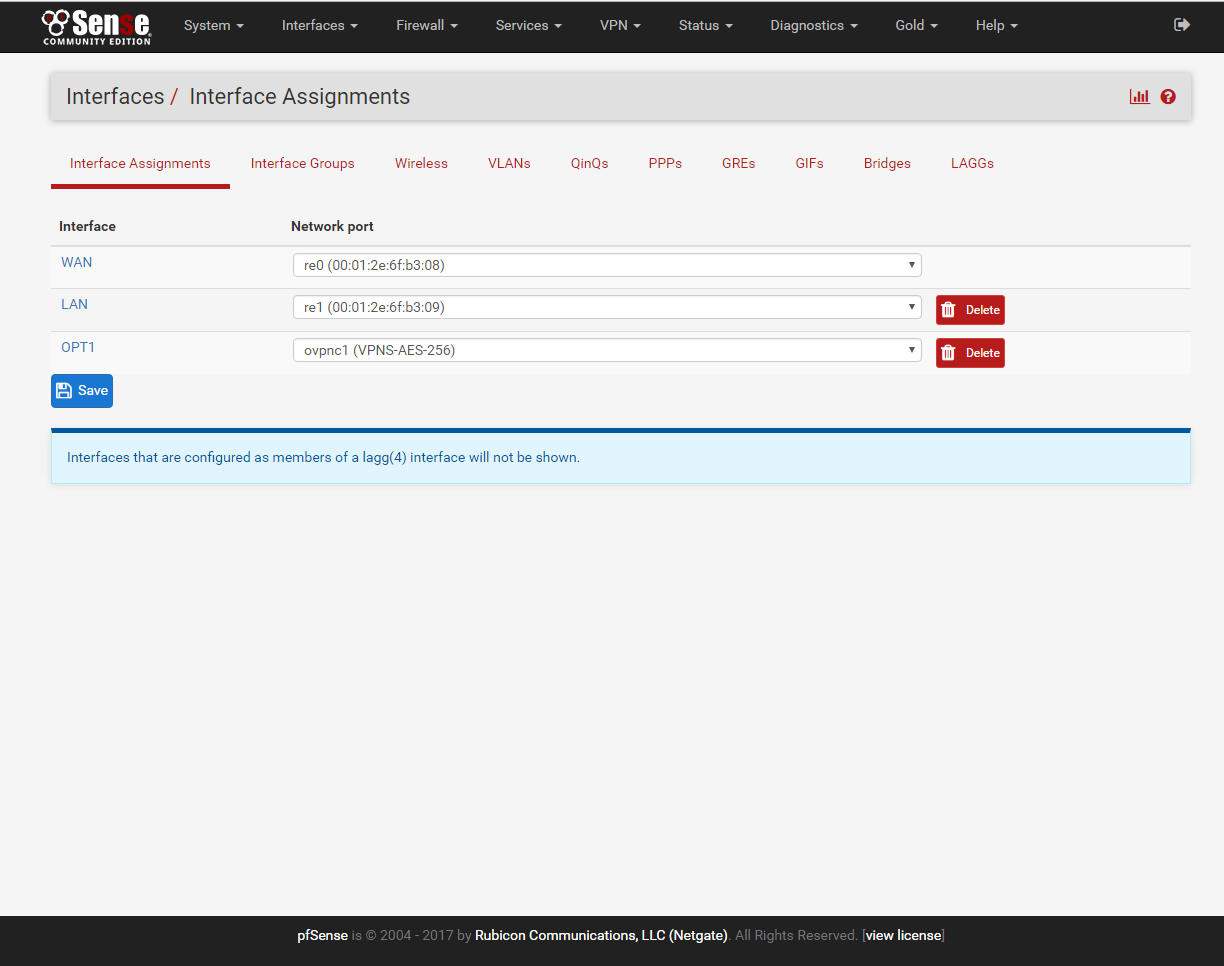
click on OPT1, Enable and rename the interface to what you like.
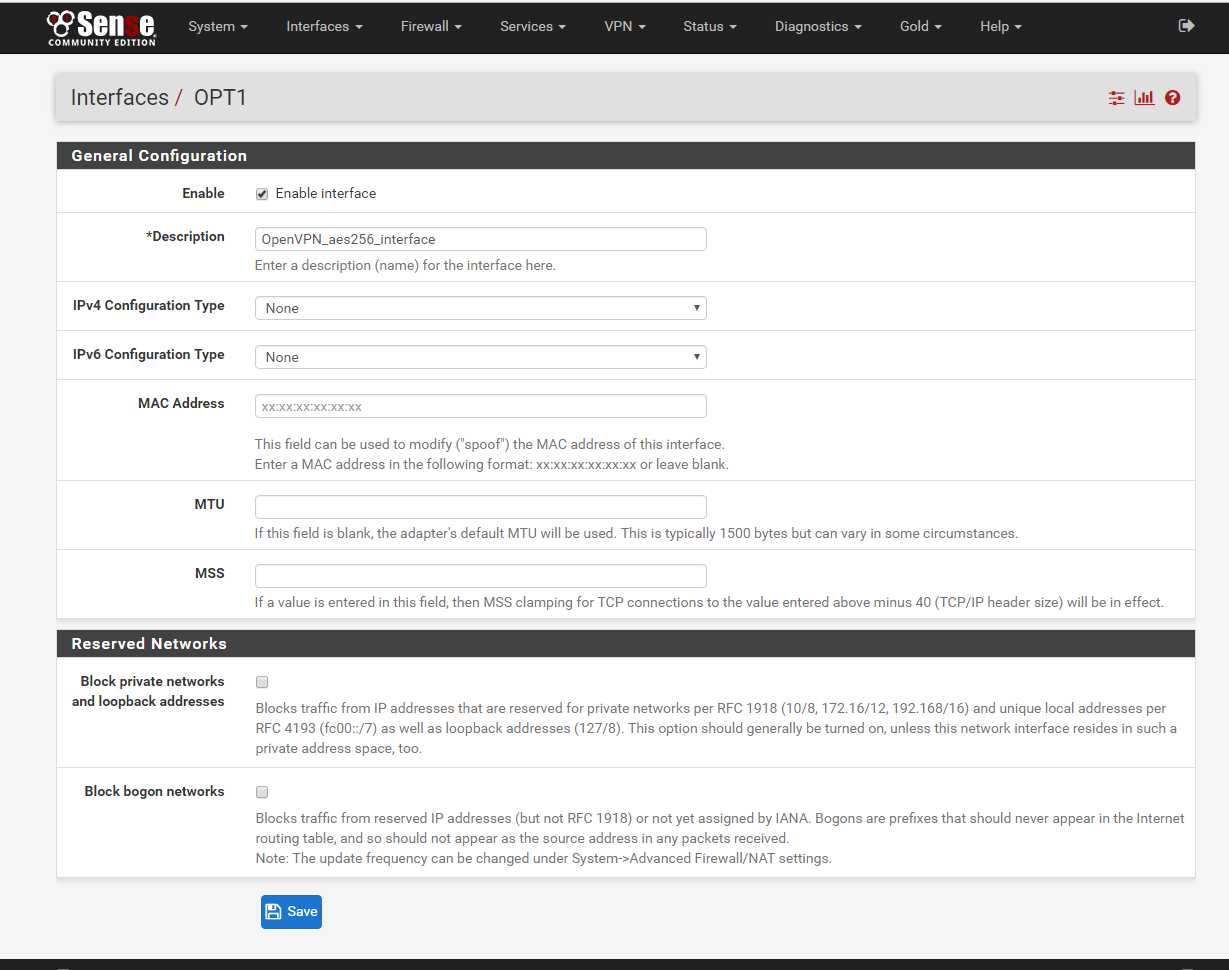
Click Save.
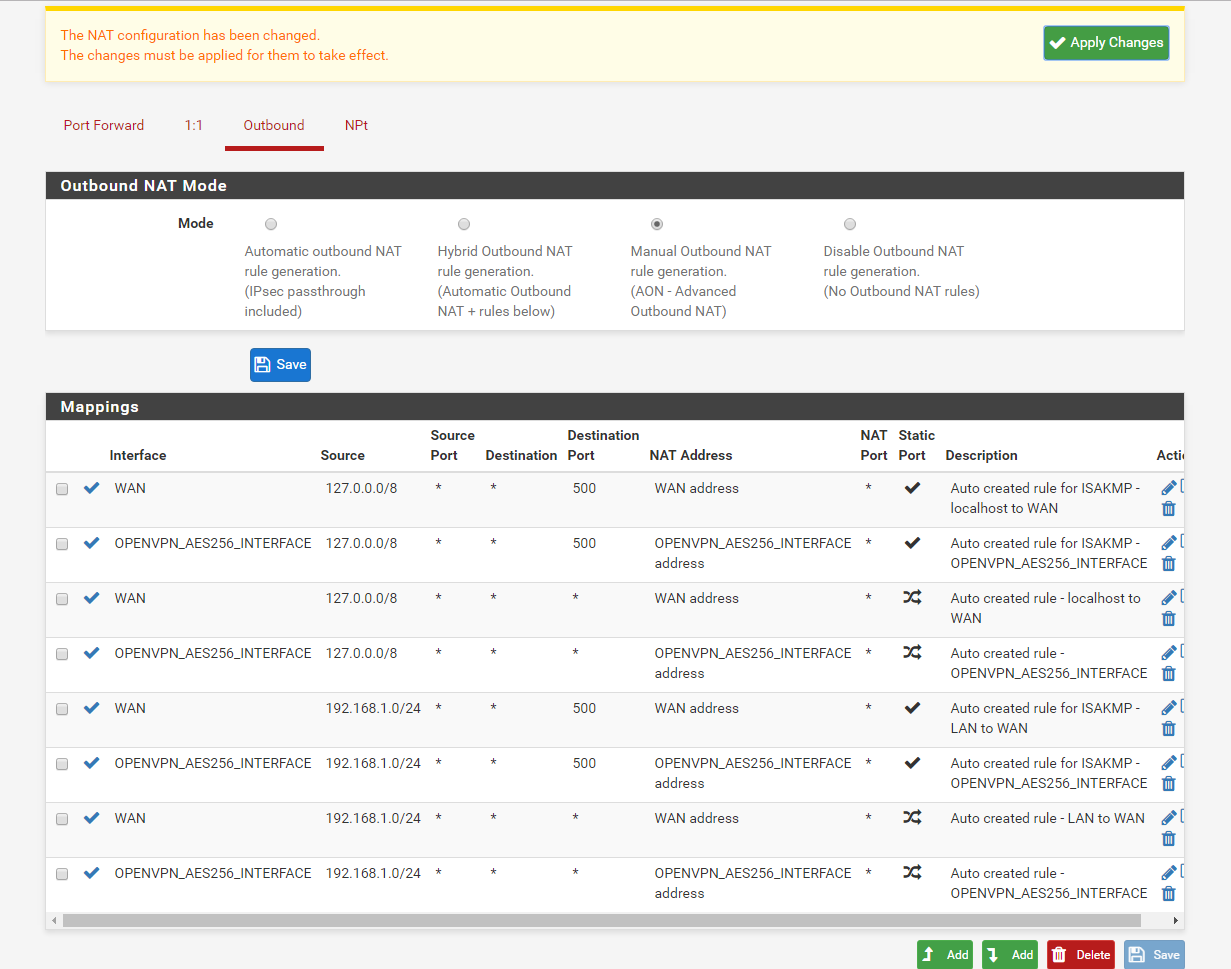
8. Go to Firewall/NAT/Outbound select Outbound and click ‘Manual Outbound NAT rule generation.(AON - Advanced Outbound NAT)’ and hit save then apply changes.
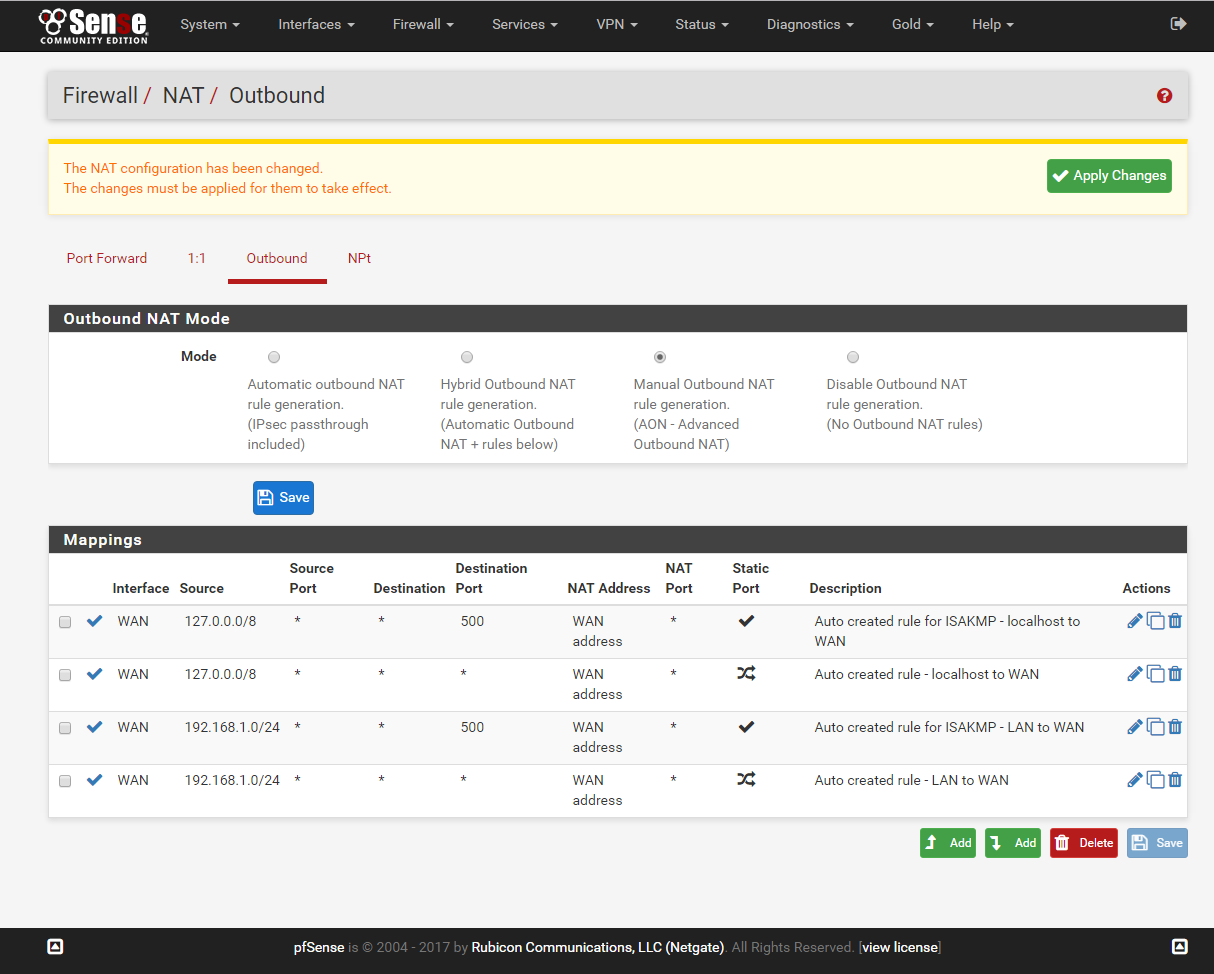
Next copy the 4 rules found in the Mappings and assign the rules to OPENVPN_AES256_INTERFACE. Rename the description and save.
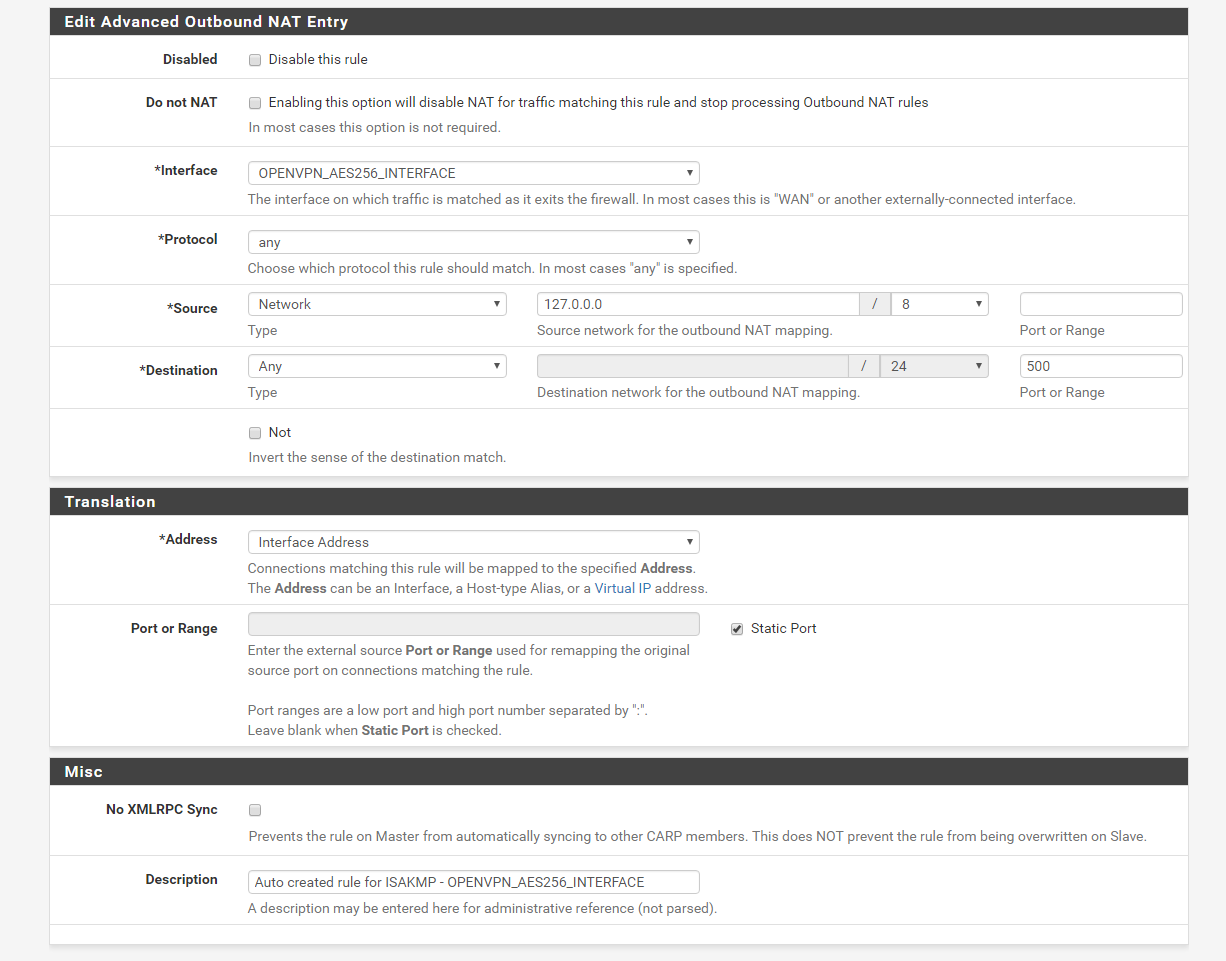
Once you have all 4 rules copied save again and apply changes
The VPN should automatically work at this stage, you may want to restart the PFSense box to make sure it comes up on reboot.
VPNSecure Provides Secure VPN servers in over 45+ Countries
If you are a looking for a versatile easy to use VPN service, checkout Today