How to configure DNS on network adapter on Windows 10
Last updated by Sam K on July 22, 2021 22:11
How to configure DNS on network adapter on Windows 10
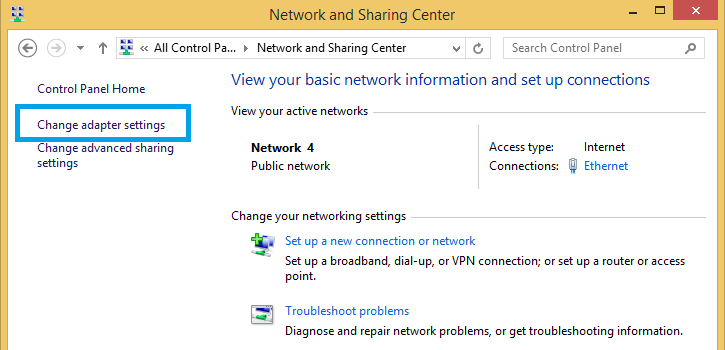
1- Open Control Panel, click on Network and Internet then click on Network and Sharing Center.
On the left pane, click on Change adapter settings.
2- Right-click on your active internet connection (this may be "Ethernet", "Wireless Network Connection" or "Local Area Connection" depending on how your computer is set up) and select Properties.

3- In the Networking tab, click once on Internet Protocol Version 4 (TCP/IPv4) to highlight it, and then click Properties.

4- Select Use the following DNS server addresses and then enter the following:
Preferred DNS server: 8.8.8.8
Alternate DNS server: 8.8.4.4
Then click OK.

5- To confirm if the DNS server addresses is already set, right-click on your active internet connection again and select Status.

6- Click on Details....

7- Under Network Connection Details, you will see 8.8.8.8 and 8.8.4.4 as DNS servers for IPv4. This is a confirmation that DNS has been set.

You can click on Close button now.
VPNSecure Provides Secure VPN servers in over 45+ Countries
If you are a looking for a versatile easy to use VPN service, checkout Today